Installing Tomcat and Configuring as Server in NetBeans
1- Download Apache from here: http://tomcat.apache.org/download-70.cgi
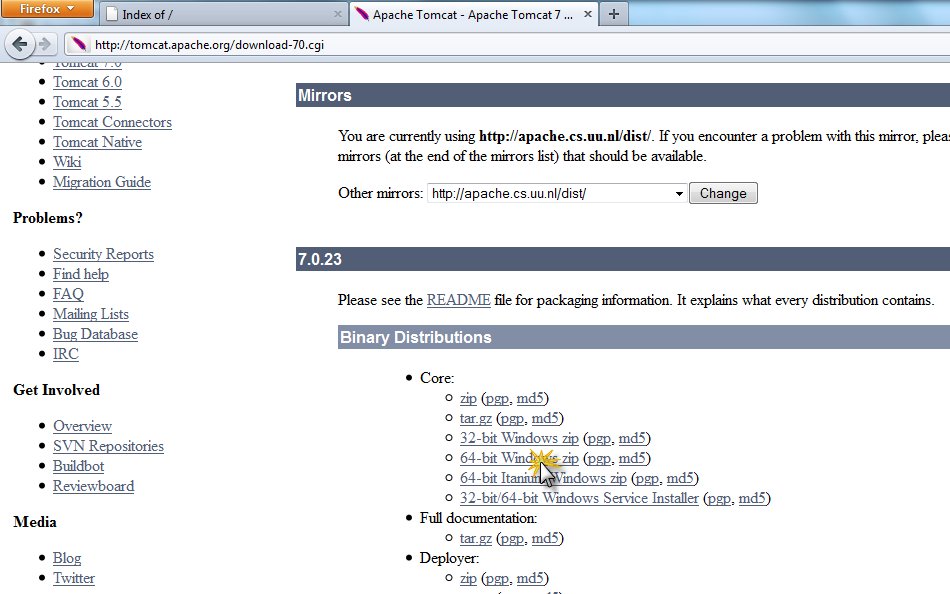


2- Follow the step:

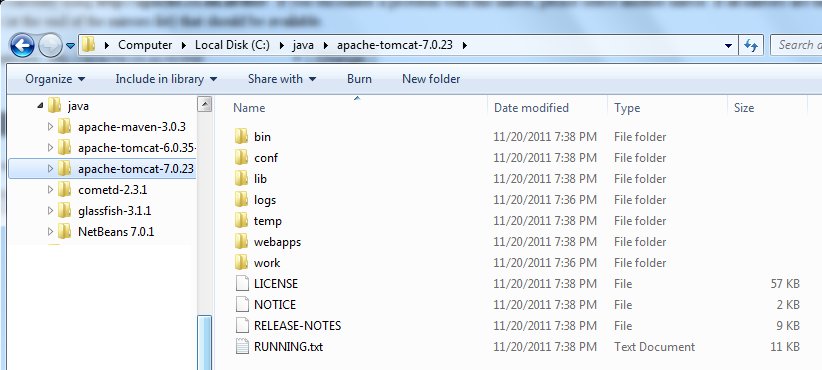
After downloading the zip-file, I extracted it to c:\java (the location is of your own choosing though).

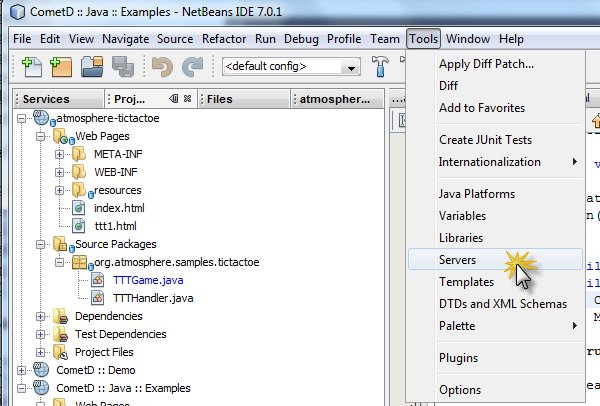
Next I turn to NetBeans to configure Tomcat 7 as a new server.
Open the Tools menu and select the option Servers:

The list of currently configured servers appears. Underneath is the big Add Server button. Press that button.

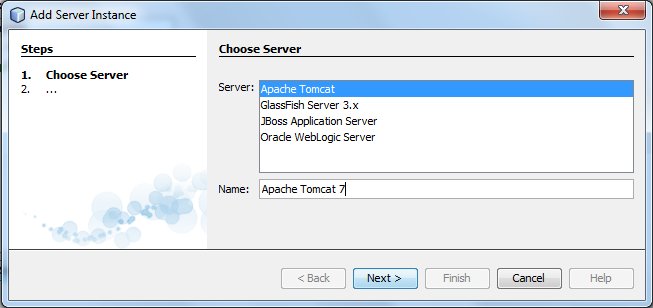
Select the type of Server to add and provide a name for it – just for reference within NetBeans.

Press Next.

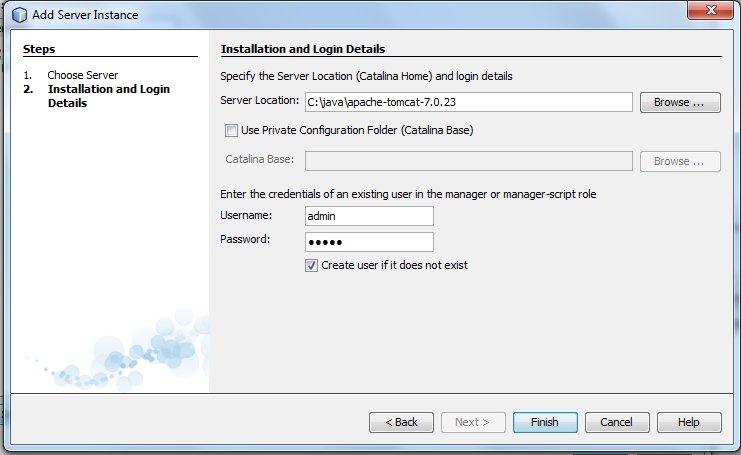
Provide the location where this server instance is installed – the target directory for the extraction of Tomcat 7. Also provide credentials for a Tomcat Administrator account ( in my case I used admin/admin).
Press Finish.
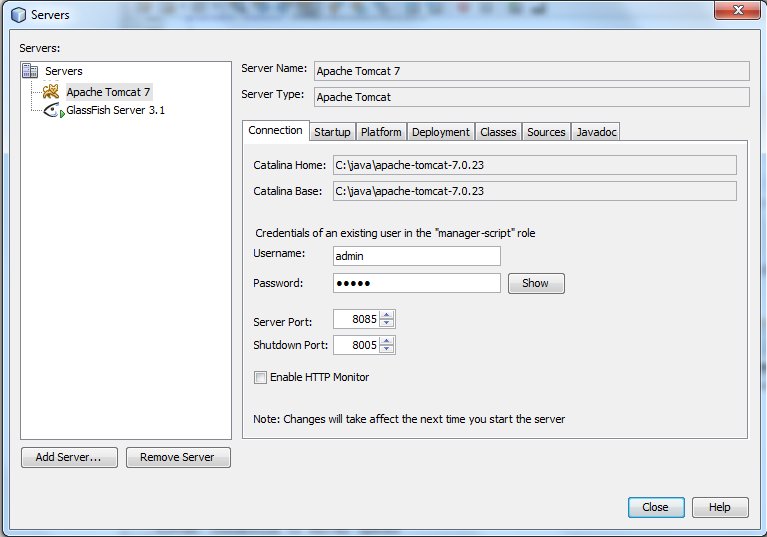
The newly configured Server is presented:

Press Close.
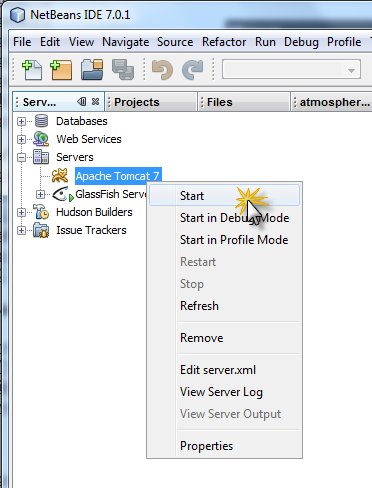
Now the Tomcat 7 Server can be started (and stopped, deployed to etc.) from within NetBeans. Open the Services Window (from the Window menu – option Services or using Ctrl-5).

The Tomcat output console appears in NetBeans:

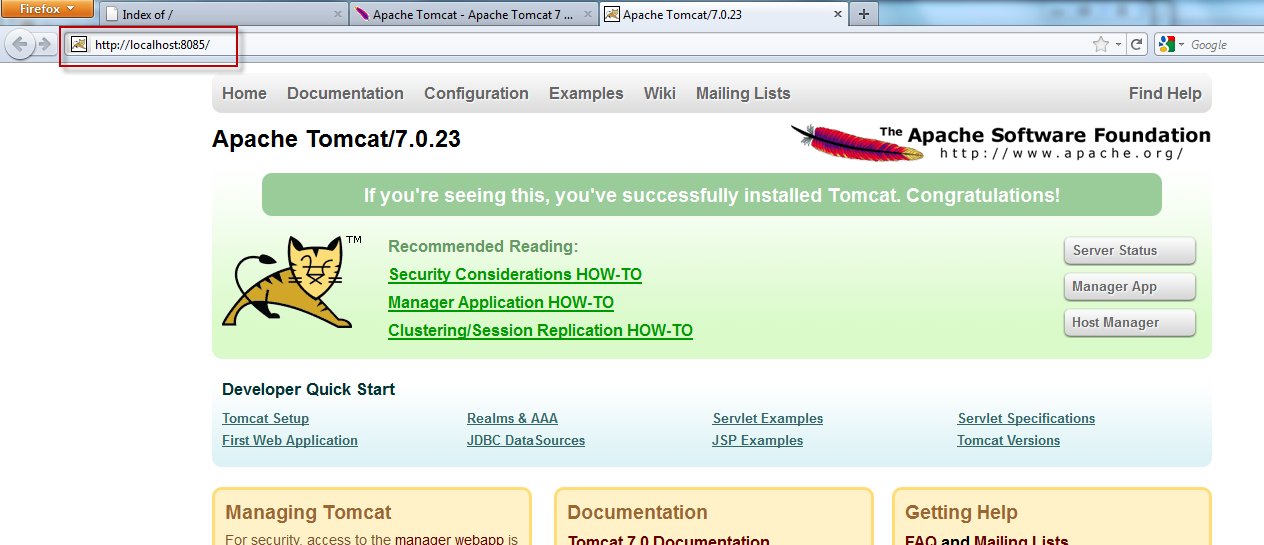
After a few seconds, Tomcat is running. The home page can be accessed at http://server:port – in my case localhost and port 8085: (you can also set your port under Apache/conf/server.xml)

Tomcat is now ready to have applications deployed to it – for example from within NetBeans.
Comments
Post a Comment